Categories
What are Custom Fields?
Social Blaze not just helps you manage your social media accounts but lets you create similar posts and share them across several social pages or groups in no time. Wondering, how?
Many times, you might need to manage multiple accounts where you are required to post similar content across all. However, each post must be tailored with specific unique snippets or details relevant to each specific account.
Let’s take an example!
If you manage social media for a retail chain with several branches, you might need to share similar promotional content. Each post should be customized with the specific’s branch address, phone number, and any branch-specific offers.
Now, it gets time-consuming to add unique details to similar posts for each account when you need to create and schedule content. To streamline this process, Social Blaze offers a solution: Custom Fields.
With Custom Fields, you can save account-specific information for each account, which you can later include in your posts. These fields can be used for various categories, such as contact information, addresses, taglines, signatures, URLs, ID numbers, legal disclaimers, email addresses, etc.
Custom Fields lets you create distinct custom fields for each type of information and tailor the content for each individual account. You can assign a unique value to each field for every account.
When you create a new post, simply select the custom field. This will automatically fetch the unique value assigned to it and get inserted into the post. Isn’t it time and effort saving?
Now, let’s learn the process of creating custom fields!
How To Create Custom Fields In Social Blaze?
The process of creating custom fields is extremely simple. The steps include:
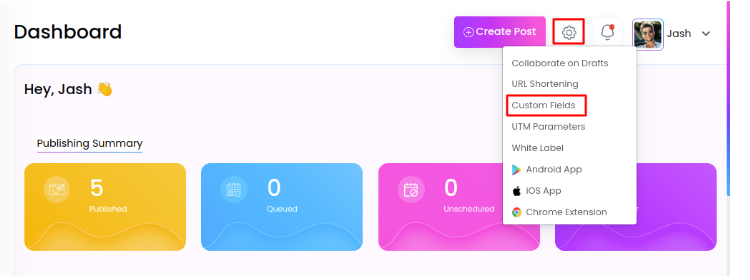
- Navigate to the Dashboard of our Social Blaze tool and click on “Settings”.
- Select “Custom Fields”.
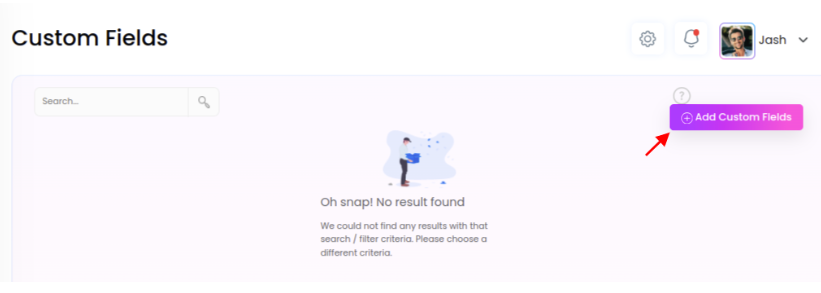
- On the “Custom Fields” page, click on the “Add Custom Fields” button.
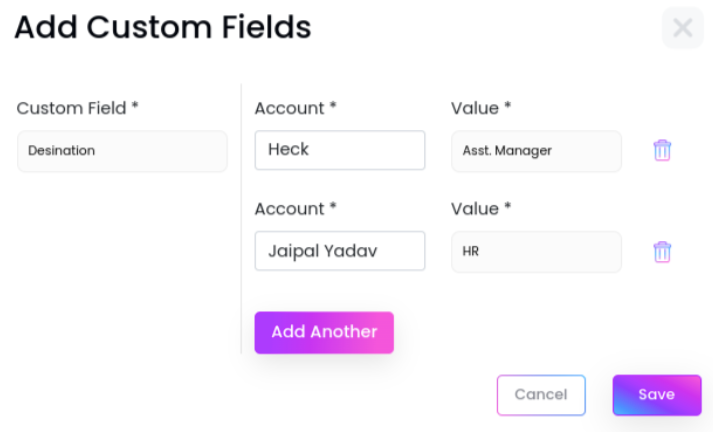
- Give your “Custom Field” a name.
- Select the account for which you want to add this custom field.
- Enter a desired value for the custom field.
- You can assign as many numbers of ‘value’ to different “accounts” for the same field using the “Add Another” button.
- Once done, click “Save” to save your custom fields.

- You can delete custom fields anytime the custom fields anytime by clicking the “delete
Icon.
Now, your custom fields are ready for use in your posts. Social Blaze allows you to edit the value of your Custom Fields anytime. However, they are certain things to consider:
- Each account can store up to 500 keys.
- For Custom Fields, the character limit is 1,000 and every field must have a unique value.
- Each Custom Fields within an account can only hold one value.
How To Use Custom Fields To Customize Your Posts?
Social Blaze uses the Custom Fields you create to streamline your post-creation process. Here’s how it’s done:
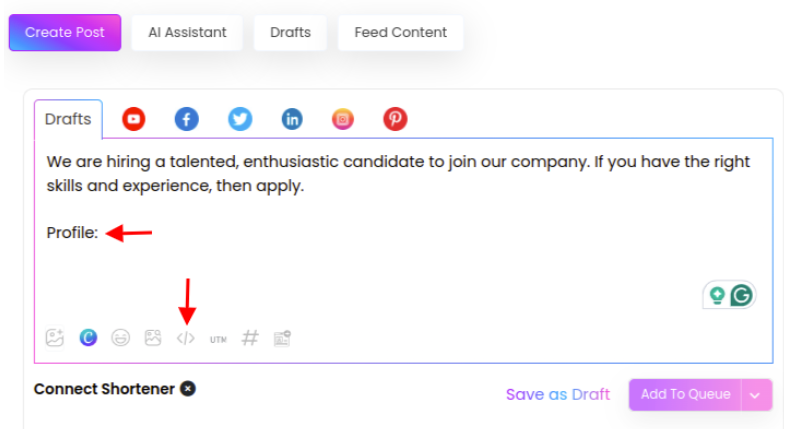
- Click on “Create Post” on the dashboard.
- Create the content that you want to publish as your post. This content will be common across all the posts.
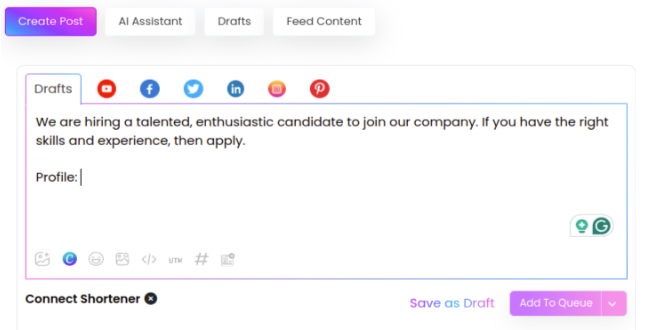
- Now move your cursor to the point where you want to add the custom field. In this example, take your cursor to “Profile”
- Click on the “</>” – the “Custom Field” icon.
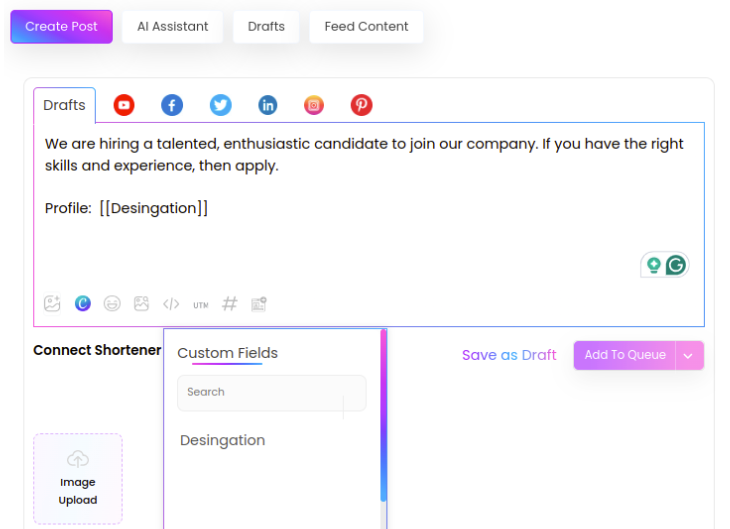
- You will see the list of all the Custom Fields you had created earlier. Select the one you want to insert into the post.
- The selected Fields will be seen in the post you created.
- Next, select the accounts you want to publish this post.
- Click “Schedule Post”.
- You can view your final post in the “Manage Post” section → “Scheduled Posts”.
The Custom Fields will be replaced with their corresponding values.

Each post you schedule for the selected accounts will automatically include a unique value that you entered when setting up that Custom Field. This unique value will be added when the post is published.